So, you’re a rock climber now, huh? You’ve got the gear, you’ve got the skills, and now you’re ready to head outside and climb rocks! But, how do you interact with other climbers at the cliff? How do you make sure you don’t say something to make you look stupid? Or worse, offend someone? Here’s some tips and climbers etiquette:
- Climbing routes can be reserved. When you get to a cliff, and you’re looking for a route to climb, sometimes you will see rope hanging from it. Sometimes, there won’t even be any climbers near by. This means that a climber has taken the time to set up an “anchor” and place his/her rope on it. This takes time, and depending on how dangerous the top of the cliff is, requires a certain amount of skill to do safely. The climbers have reserved this route to climb, and it is unwise to try to set up your rope on the same line. Trust me, this will definitely start conflict. Find a different route without a rope hanging from it.
- Climbers love music. It has been my experience that you almost always hear music at the crags. But before you blast Dr. Dre on your portable speaker, make sure you ask everyone at the crag what their taste in music is. You don’t want to play Hip Hop if the other group at the cliff prefers Jazz. An easy way to accommodate everyone, I’ve found, is to swap out iPods every half hour or so. This way everyone gets to hear their own music at least once.

- If you’re out there, chatting with other climbers and making friends, please be mindful of what style the climbers are climbing in. Some climbers are top roping, in this case it is safe to walk over and start a conversation with them. However, there are other kinds of rock climbing, such as traditional rock climbing. This is where the climbers start from the bottom of the climb, as well as their ropes. As they climb up, they stick in pieces of metal protection such as chocks and SLCDs (post on that to follow). This technique requires immense concentration, and as such, please respect these climbers by not talking to them while they are climbing and/or belaying.
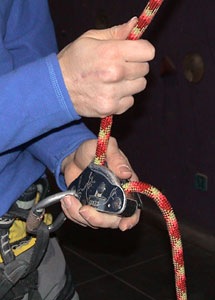
- Learn your commands! Nothing will make you stand out more as a noobie than not knowing your climbing commands. Climbers have their own language, and it’s best to learn it ahead of time so you don’t look foolish. When you start to climb, turn to your partner and say, “Climbing”, then he/she should respond, “Belaying”. If you need to rest after a hard move, let your partner know by saying, “Rest”. This lets him know to sit on the rope to make it tight so that you do not lose upward progress. They should respond with something like, “Static”, so that you know that the rope is now tight and you can rest. When you continue climbing, repeat “Climbing”, and your partner should repeat “Belaying”. Other commands are: “Watch me”, to indicate you are doing a hard move. “Dirt me”, to indicate you are ready to be lowered to the ground (dirt). “Come on!”, to cheer on a climber. “Sent”, a way of saying you got to the top of a route. There are hundreds more, and I will list all of them in a later post.
That’s it for now. I will continue to add posts about how to behave while rock climbing in future posts, but for now, stay safe and have fun!
As always, walking is knot climbing 😉

 Long story short, I sent my first 5.12 route today! At our gym, I spent a few hours trying to set a 5.12 route, so that I could work on something at my limit. I had tweaked the route dozens of times, and when I felt it was ready, I grabbed my climbing shoes and tied into the sharp end! I worked it on top rope for almost 2 days! Finally, today I reached the top. I want to thank my belayers for their patience and encouragement. I was able to do the whole route with only one fall (it was only on the 3rd move so I kept going). I feel like this is the hardest route I’ve sent, the previous hardest being a 5.11. I am excited to keep progressing as a climber.